Category Archives: Tutorial
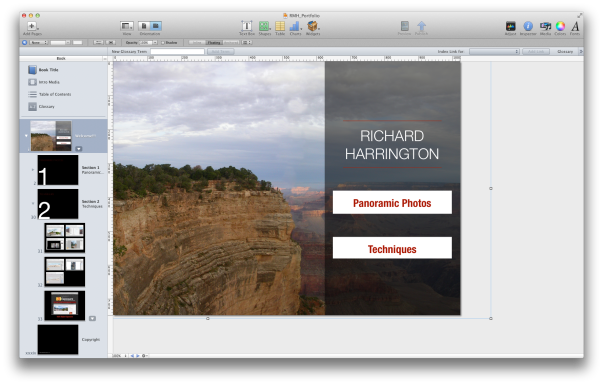
Have an iPad? Download a Free iBook on Panoramic Photography
I wanted to give the new iBooks Author app a whirl, so I bundles up some of my panoramic photos. I also tossed in almost an hour of previously released tutorials.
Please let me know your thoughts in the comments section. I am working on some new training using this platform and would love your opinions.
Get the book here – http://itunes.apple.com/us/book/panorama/id497463957?mt=11
Zoom, Zoom, and Check: Manually Focussing a DSLR Camera for Lowlight and Video Shooting
When you are shooting in lowlight conditions, it can be very difficult to get your camera to focus. Similarly, when shooting video, focus often becomes a manual process as well. If want to check focus, you need to take a few extra steps. Just turning on the LCD and glancing at it won’t cut it. The small screen makes everything look more in focus because it can’t show you all the pixels at once. The reduced image size creates the illusion of a sharper image.
The Technique
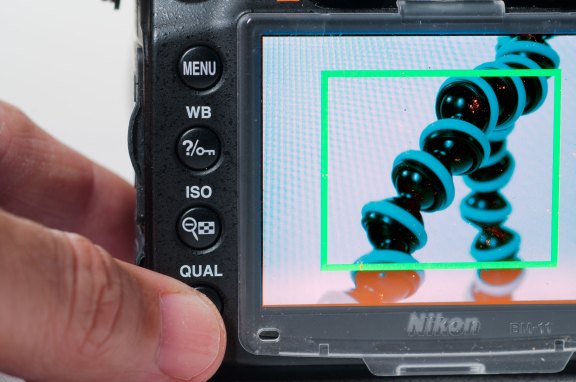
If you want to really see what is in focus, you’ll need to zoom, and then zoom some more. If you’re using a zoom lens, zoom in as tight as possible on your subject. Zooming in on an area like the eyes works well; a button on a shirt works well too. You’ll then need to digitally zoom.
Typically, you’ll find a Zoom button (look for a magnifying glass with a plus symbol in it) on your camera. Pressing it will enlarge the image on your screen and only show you part of the image. You may need to use the command dial to navigate around the zoomed in pixels. Find the detail area that you want to focus on.
You can then use the focus ring on your camera lens to tweak the focus. Make minor turns to find the ideal focus. If needed, adjust the aperture and ISO settings of your camera to refine the depth of field. When you’re satisfied, you can either press the Zoom Out button or just press the Record button or shutter release to roll the camera.
Want Better Photos or Video? Avoid Lens Flares
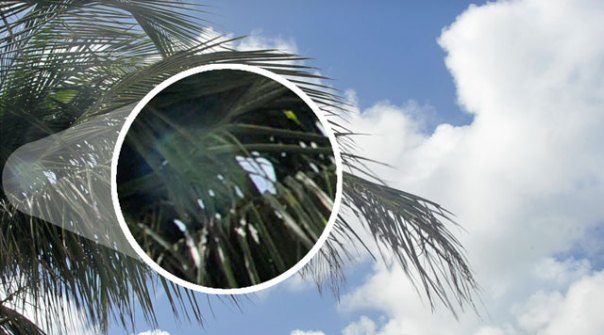
Pointing the camera up into the sun is an almost guarantee to get lens flares. You’ll see a washed out area with a geometric flare in the trees.
While the sun is generally incredibly useful to photographers, it can occasionally be annoying. If the sun hits your lens at an undesirable angle, you can end up with spots or flares that ruin a shot. Flares generally take on a geometric shape, and may be easy to miss while shooting. Additionally, a flare can significantly reduce the amount of contrast and saturation in your image.
The flare is typically caused by a very bright light sources (in most cases the sun). Flares are far more common in zoom lenses as they have multiple surfaces that are prone to light scatter. With a little practice you’ll learn to spot flares quickly. Getting rid of flares just requires a few strategies and modifications to your shooting style.
Use a Hood
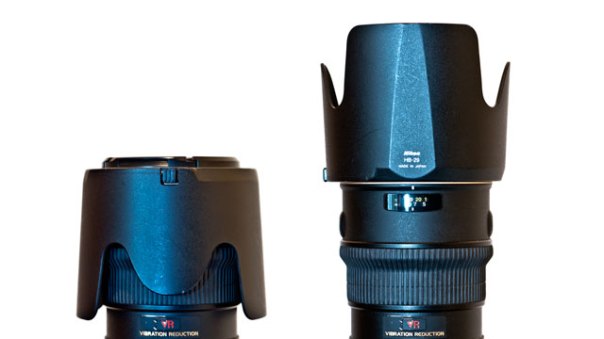
When shooting, reverse the lens hood to protect your lens from flares and other issues. You can reverse it back for packing or shipping.
Most lenses include a hood attached at the end of the lens. Typically, the hood is reversed for shipping (to make the lens shorter and easier to pack). Unfortunately most people never bother to turn the hood around.
Once a lens is mounted to your camera, you should properly set the hood. With a quick turn (and perhaps a push of a release button) the hood can be removed. Reverse its direction and re-attach it to your lens in order to protect the lens from flare.
Hoods are usually specific to each lens. Some will have notches (called petals) to better accommodate the aspect ratio of your camera’s digital sensor. These type have an angle of view which is greater in one direction than the other . Others will vary in length to avoid casting a vignette in your final image.
If you lose your hood, I recommend you purchase a replacement. The hood is the best way to cut down on flares. It can also help protect the front of the lens from accidental impact as well as contact smudges.
Keep the Lens Clean and Clear

The use of a cheap UV filter accentuated my lens’ tendency to flare when shooting on a bright sunny day.
Most lenses have an anti-reflective coating to cut down on lens flare. Of course greasy fingerprints and other smudges can also cause their own problems. When you clean the lens, be sure to use a proper lens cleaning cloth to remove smudges without damaging this coating.
If you’re going to use additional filters on your lenses (such as a protective UV filter or a neutral density filter) make sure you don’t skimp on quality. Cheap filters often lack good anti-reflective coatings). These filters can often cause flare through the introduction of additional reflective surfaces. If using filters, make sure you choose a quality that matches your lens.
Flag the Lens

I used a Rogue FlashBender to protect the lens from additional flare while shooting on a bright day.
One way to prevent lens flare is to block the light. Typically the flare is caused by light entering from the side of the frame. This light is rarely needed for a proper exposure and can be blocked. If using a tripod, you can place your body to the side of the lens to serve as a wall. You can also reach out with a hat off to the side to block the light.
You can of course use other devices to block unwanted light. I’ll often attach a Rogue FlashBender right to my lens (http://www.expoimaging.com). These flexible cards are normally used to shape an off-camera flash, but I find the built in flexible support rods bendable surface works well to flag a troubling flare.
Change your Position
If you can’t minimize a flare, you have one simple recourse. Move your camera until the flare is gone. Remember flare is caused by light hitting the lens at an unwanted angle. Often a little adjustment can be very effective at removing the flare. You can look to frame the shot so objects are blocking the sun or light source (or even reposition your subject to block the light for you). You may find that tilting or panning the camera just a few degrees can remove the flare.
Creating Motion Streaks in Camera for Time-lapse Movies
On way to convey a sense of time is with motion streaks. I recently refined my approach and would like to share it with you.
The key to streaks is to leave the camera open for a long time. Of course doing this tends to let too much light in the camera and can overexpose the shot. Here’s how to pull things off.
- Set the ƒ-stop very high. In this case I used ƒ/22.0.
- I set the shutter speed to 2.0 seconds. The actual time you’ll use will vary based on the speed of which objects are moving. The slower the speed the longer the shutter should be open.
- Adjust the ISO setting so you don’t get too much noise. For this shot I used ISO 560.
- Turn down the exposure compensation setting to recover the overblown shot. I pushed this all the way to -5.0.
- Tweak the ISO until you get a proper balance of the exposure triangle.
- Shoot Raw if possible to give greater flexibility in shadows and highlights after the fact.
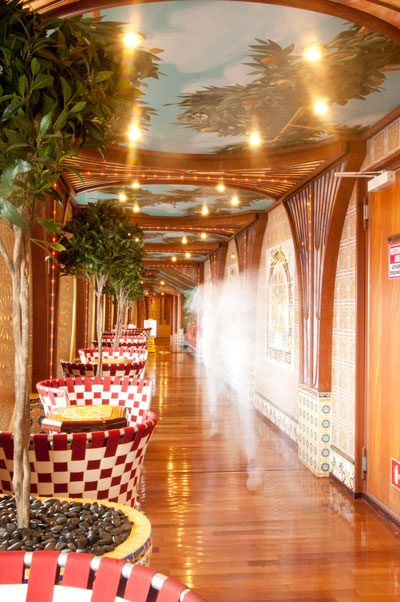
Here is the end result. Keep in mind that this was shot on a wobbly platform (a cruse ship).
This post sponsored by iStockphoto.
An Abstract Time-lapse Experiment
I am currently on a boat… a platform that is wobbly and moving.
So of course one of the first ideas I have is trying to shoot time-lapse. (I hope you see the foolishness of my ways).
Of course I am stubborn, and I am actually finding that a little stabilization can fix the motion.
Last night I wanted to try an unlikely time-lapse. Here is the result.
Exposure 10 seconds
Shot Raw at ƒ4.0 and ISO 1600
50mm lens pointed at the skyline of the ocean. 4 AM coming into land.
Import into After Effects as a Camera Raw image sequence
Applied warp stabilzer
Layered with copy of itself, offset 1 frame and set to 50% opacity and screen blending mode.
Repeat the duplicate and offset technique and set second copy to 25% opacity.
Is this abstract… yep. But I kinda like it.
